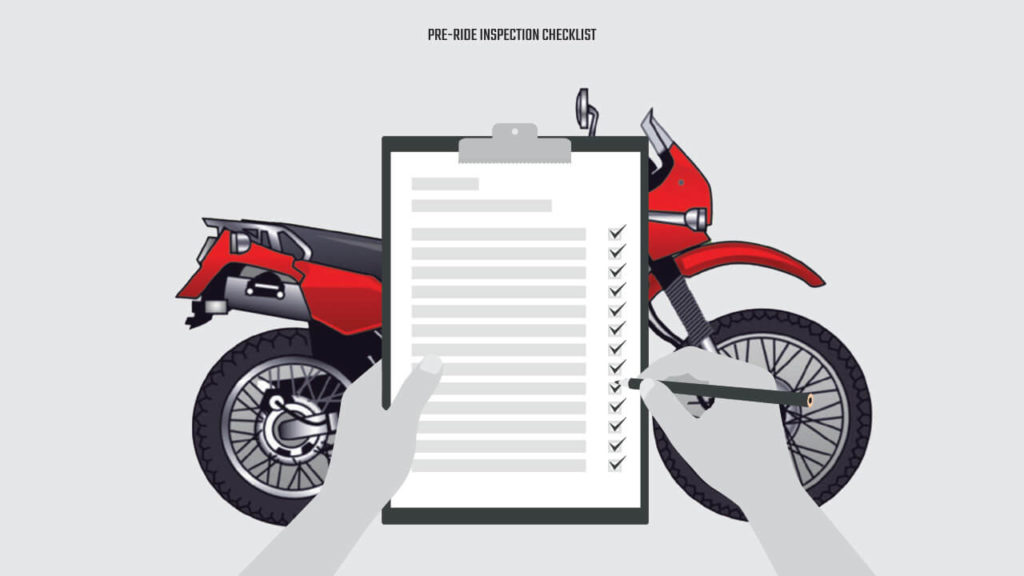
In the Rider Handbook, we give you a short list of things to check before every ride with the T-CLOCS inspection list. The list is basically just a list of every major part of a motorcycle and there’s not a lot of detail on how to inspect each item (other than “read your owners manual”) or about what do it if something does look wrong.
- T – Tires (& Wheels)
- C – Controls
- L – Lights (& Electronics)
- O – Oil (& Other Fluids)
- C – Chassis (Frame, Suspension, Final Drive, & Fasteners/Bolts)
- S – Stand(s)
Luckily, there is a more in-depth version of the checklist published by the MSF available here. I’m not going to waste your time by repeating everything that you can see in the linked article, but I do want to give you a bit more background on major things to look for and why — focusing on things I wish I’d known when I started riding.
After going through each section of T-CLOCS, I’ll give you some general tips on how to get started with maintenance and repairs. Even if you plan on using a dealership or service center most of the time, it’s good to have a general idea of what’s going on and how to do the basics.
There’s no way to write a guide that gives step-by-step instructions for every motorcycle. The best place to turn for specific instructions & questions are model-specific service manuals and internet forums for your make & model of motorcycle. Your owner’s manual might give you some basic information, but a full service manual will give you step-by-step instructions with illustrations. If you don’t have one, there are forums dedicated to almost every motorcycle with knowledgeable users to ask questions. They’ll often have wiki’s or FAQ pages for common tasks & issues.
T-CLOCS
Like I said above, I won’t just repeat every single item that’s listed in the MSF Checklist. Instead, I want to highlight some particularly important items and give you context for what to watch out for and why. A lot of the items in the T-CLOCs list are also important items for setting up the bike for your comfort and preferences, so I’ll try to highlight those as well.
The other question we get a lot is “do I really need to check everything every time I ride?” My personal take is that you should at least know the status every time you ride, but realistically few riders will go over the entire list before every ride.
Check more often when you first buy a motorcycle (and any time you make major changes) and get a feel for how much maintenance it’ll need. I’ve had brand-new tires on a brand new bike that, like clockwork, lost 1-2 PSI of air every week no matter how often or far I’d ridden. Some motorcycles (especially older, high mileage bikes) consume oil and will need topped off between changes. You should still do a full inspection on a regular basis, at least at the beginning and end of every riding season and before & after long trips.
Just remember that on a motorcycle, maintenance issues are safety issues. Think about having an engine seize, tire blow out, or brakes fail. If you’re in your car you have a bad day and an expensive repair; if any of those happen on a motorcycle you have a catastrophic loss of control and, potentially, expensive hospital bills.
Tires & Wheels
Tires
Tires are consumable items which need replaced regularly, but they’re also an incredibly important safety feature. Tires determine how much traction you have available for braking & cornering, and are the only part of your motorcycle in contact with the road.
Touring tires can last more than 10,000 miles, but more aggressive tires (sport and off-road knobbies) may last less than 2,000. Most common street tires will be somewhere in between those extremes, but don’t expect them to last as long as car tires. Your personal riding habits have big influence on tire life, as well. Every tire balances grip with longevity — more aggressive tires will wear faster, and long-lasting tires will generally have less grip. Advances in construction techniques and rubber compounds have dramatically improved motorcycle tires over the years, both in terms of wear characteristics and performance. In a familiar dilemma, a tire can be inexpensive, have high traction, or be long lasting; you get to pick two.
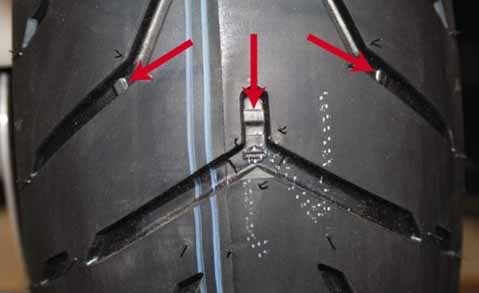
In addition to wear, tire pressures should be checked regularly. Both over- and under-inflating can affect traction, fuel mileage, and safety. Go by the recommended pressure(s) in your manual (or sometimes a sticker on your swing arm), not by the “max PSI” number listed on the sidewall of the tire.
With modern motorcycle tires, you will not be able to effectively judge pressure just by looking at, squeezing, or kicking them. Tires can still be under-inflated enough to affect safety & performance without looking or feeling noticeably different. Use a tire pressure gauge.
- Under-inflating increases tire flex. This can increase grip by increasing the length of the contact patch (more of the tire gets flattened against the ground) and helping the tire heat up faster, but this comes at the expense of handling, fuel mileage, and tire life. In extreme cases, the excess heat generated can cause blow-outs, and the flex can lead to your tire coming off your rim if your tire impacts something (sometimes call a pinch flat).
- Over-inflating reduces tire flex. This can increase your fuel mileage & tire life by reducing the heat generated by the tire, but comes at the expense of traction. Because the tire stays more rigid, it can make the handling feel sharper, diving faster into corners. The downside is that your contact patch is smaller and the tire is less flexible, lowering traction and making wash-outs & wheel lock-ups more likely.
You can use minor variation from the recommend pressure to fine-tune your bike’s handling. In cold or wet weather (or other traction-reducing situations), lowering tire pressure may be a wise choice. If you’re planning a long trip with a lot of highway miles, increasing tire pressure can ensure that you don’t need a tire change mid-trip. You can experiment, but try to start within 10-15% of the manufacturer recommended pressure (i.e., for a recommended pressure of 30 PSI, try to keep your tire pressures in the 26-34 PSI range).
Wheels
Checking wheels is mostly looking for damage or wear. If you have cast (solid) wheels, look for dents, cracks, or other damage. For spoke wheels, look for any bent or loose spokes. Any damage to your wheel or spokes can lead to catastrophic wheel failure, which is not something you want on a two-wheeled vehicle.
When your wheel is off for a tire change it’s also a great time to check the wheel bearings for play.
Controls
Your motorcycle’s controls include your main contact points with the motorcycle: your foot controls, levers, throttle, and handlebars. Checking them is important for safety (you can’t control your motorcycle when your controls fail), but adjusting the controls for your body and preferences can help to reduce fatigue and strain when riding.
Brakes
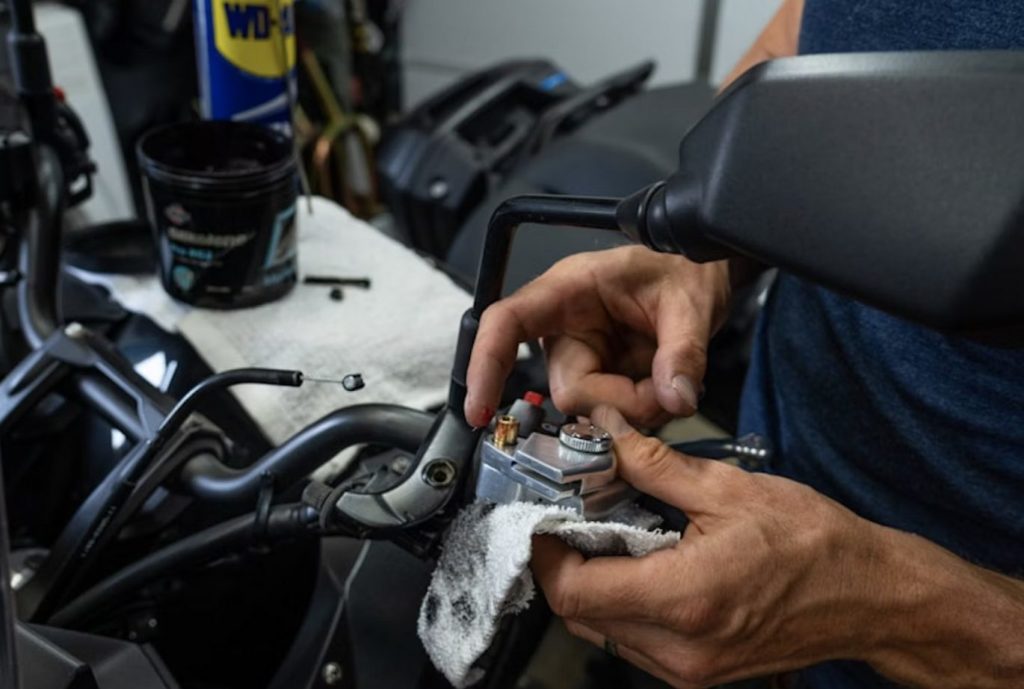
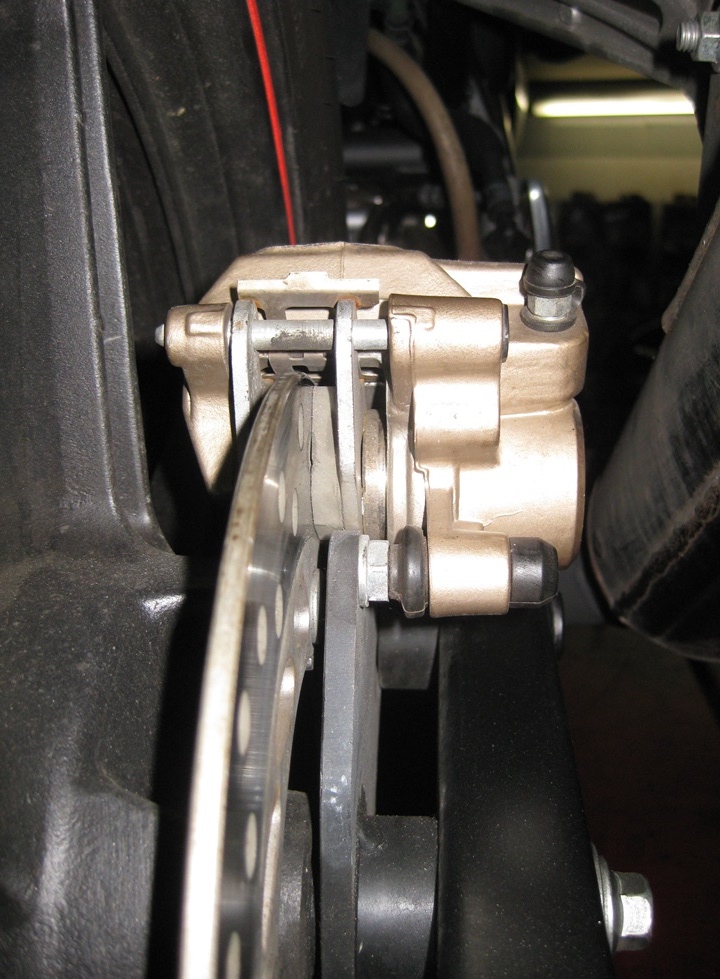
Most modern brakes, front and rear, are hydraulic, meaning that operating your rear brake pedal and front brake lever pushes brake fluid through hoses into calipers which squeeze your brake pads together (pinching the brake rotor). Both your pedal and lever should become progressively firmer as you operate them — if you feel any give or sponginess then there’s something wrong with the hydraulic system. That could mean something as simple as air in the system or old brake fluid (most common), but it could also point to a leak or other mechanical issue. Changing the brake fluid and bleeding the system may sound intimidating, but it’s actually a pretty simple procedure.
Brake pads should also be regularly checked to make sure they are not worn. This can usually be done visually, but your manual will specify a minimum thickness for the pads. Changing brake pads on most motorcycles is actually a pretty quick & easy job which can be done without taking the wheels off. Rotors will also wear over time and have minimum thickness specified in your service manual.
Cables
On most street bikes, the clutch and throttle are cable-operated (more premium machines may have hydraulic clutches or electronic throttles). Make sure both the clutch lever and throttle cables are adjusted so that there’s some free play in the control (a dead zone before the cable is actually pulled) as the bars are moved from side to side. This will ensure that you don’t put undue wear on the clutch or rev the bike just by turning the bars.
Increasing the size of the clutch dead-zone effectively moves the friction zone closer to the bars, just make sure the clutch is fully disengaged before the lever reaches the bar.
Both the clutch lever and throttle should return to their starting positions quickly and smoothly when you let them go, and both will need periodic lubrication.
Steering
Your handlebars are how you initiate steering and are a convenient mounting point for all the other controls. Mostly you just need to make sure the your handlebar is still straight and square to your forks if you drop the motorcycle or hit something with your front wheel.
You should also periodically put the bike up on a stand and slowly move your bars from lock to lock with the front wheel in the air — any resistance or notchiness point to a worn steering head bearing. While you’re there, grab the forks and try to pull them straight forward and backward — any free play means you need to tighten your steering stem nut.
Lights & Electrics
Lights
Lights are easy to check — just use your switches to turn them on and make sure they work. All of your lights are critical for safety: headlights help others see you just as much as they help you see, turn signals communicate your intentions, brake lights warn others when you are slowing or stopped, and your tail light keeps you visible from behind. For lights that you can’t see while sitting on the bike, check by holding your hand in front of the light.
The LED lights that come on most newer bikes seldom wear out, but older incandescent bulbs will burn out over time just like any other light bulb. Turn signals are some of the most commonly damaged parts in a tip-over, but they’re generally quite easy to replace with inexpensive universal turn signals. Just be aware that if you replace incandescent turn signals with LED units, your bike may “hyperflash” because of the lower resistance — you can either swap out your turn signal relay or add some resistors to the wiring to make up for it.
Electrics
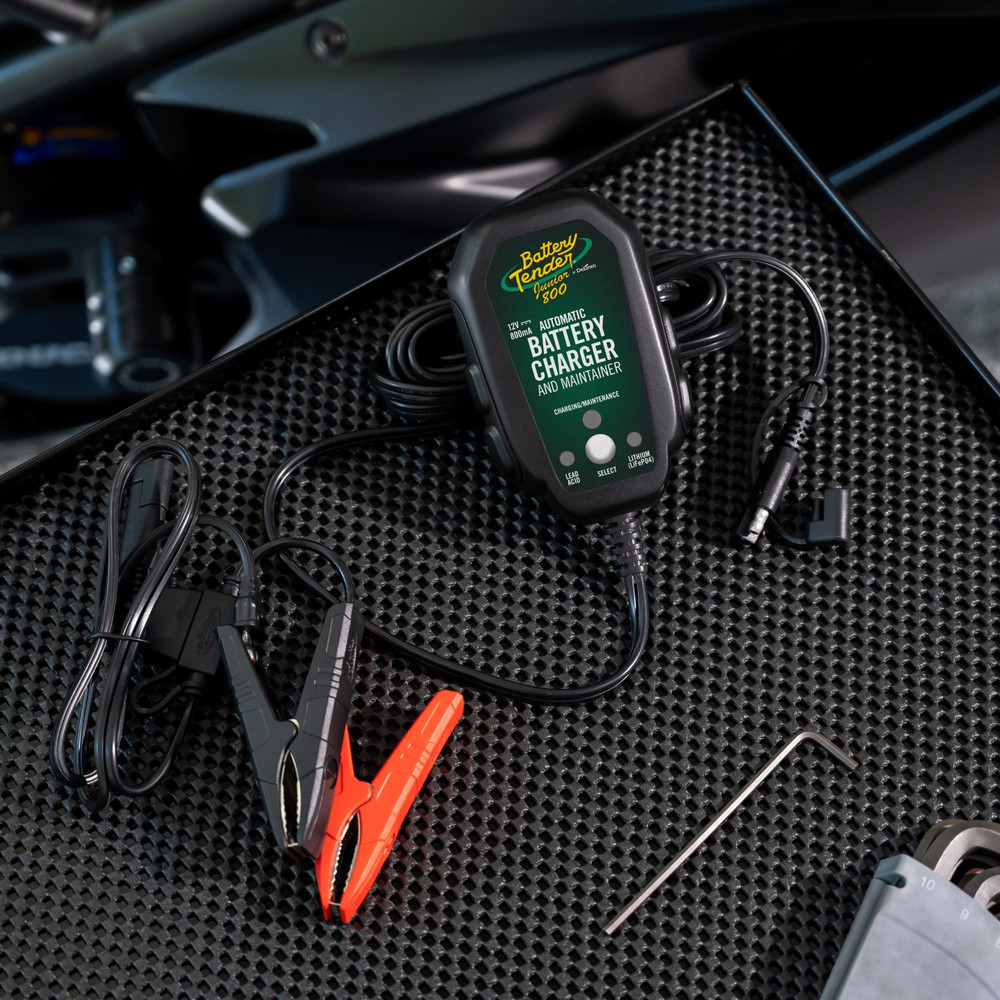
A huge percentage common electrical problems (hard starting, bike randomly dying, etc.) can be traced back to a loose battery terminal or dying battery. If you experience any weirdness with your bike’s electrics, start by making sure your battery leads are screwed down tight. If they’re tight or your problems persist, move on to checking your battery.
All batteries do eventually die, but you can prolong their life by taking your battery inside or plugging your bike up to a battery maintainer during the winter (just make sure it’s a battery maintainer and not just a charger, as over-charging can damage the battery). If replacing your battery doesn’t help (or your bike keeps killing batteries), you’ll have a more complex diagnosis of the charging system to deal with.
All motorcycles have at least one fuse in the wiring harness or a bank of fuses controlling power to different systems. If your bike (or some parts of it) suddenly die, it may just be a blown fuse and a quick fix.
Oil & Fluids
Oil
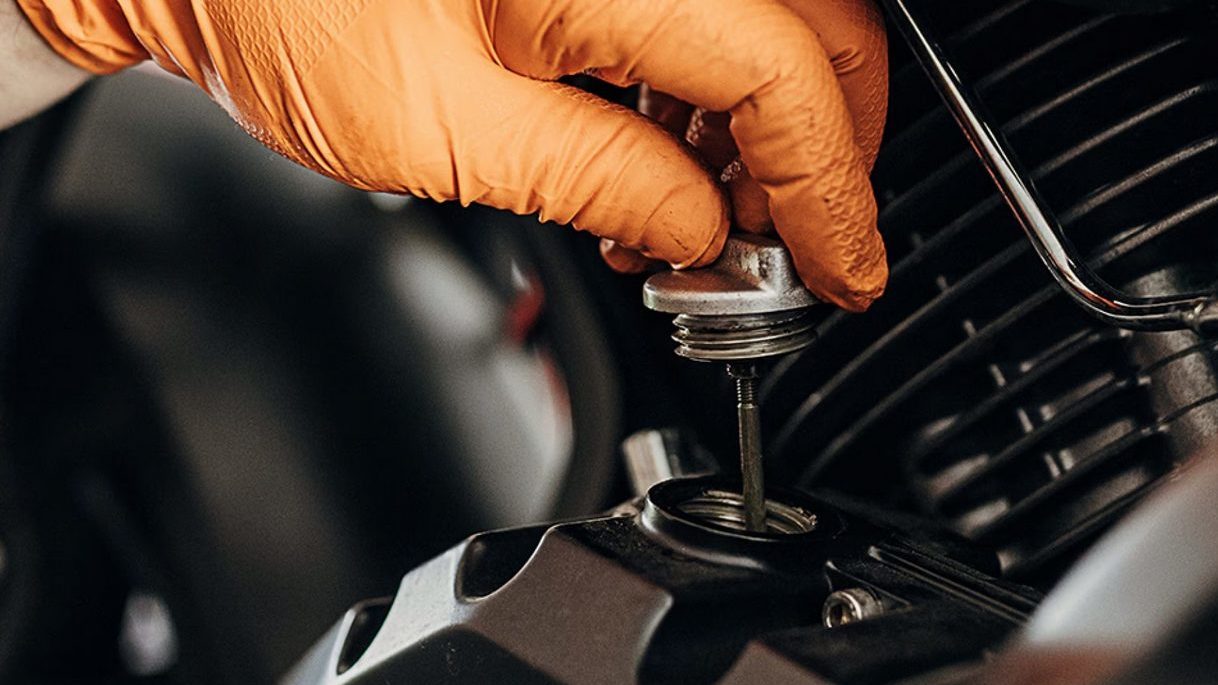
One of the most important fluids in your motorcycle, oil lubricates and helps to manage temperatures in your engine. Oil breaks down over time and loses its viscosity, so oil and filters need to be changed regularly (either annually or after a predetermined number of miles, check your owners manual).
Motorcycles require motorcycle-specific oil because the engine and clutch share the same oil — car oils contain friction-reducing additives which can cause motorcycle clutches to slip. Check your owners manual for the type (petroleum, synthetic, or semi-synthetic) and weight (5W-30, 10W-30, 20W-50, etc.) appropriate for your engine. Using the wrong type and weight of oil can cause damage to your engine.
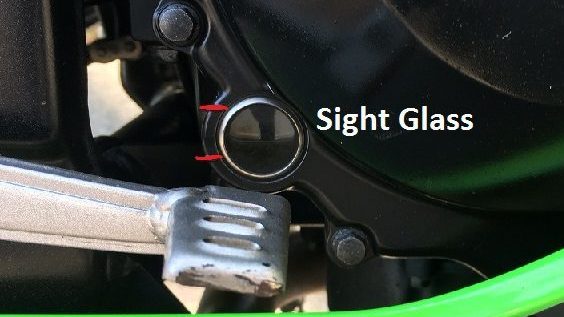
Some bikes will also consume oil over time, especially older engines or if you tend to ride high in the rev range regularly. Know how to check the oil on your motorcycle, usually with a sight glass or dipstick. You can top off with any other oil of the same type, but try to stick to the same brand that’s already in their to maintain additive ratios.
Other Fluids
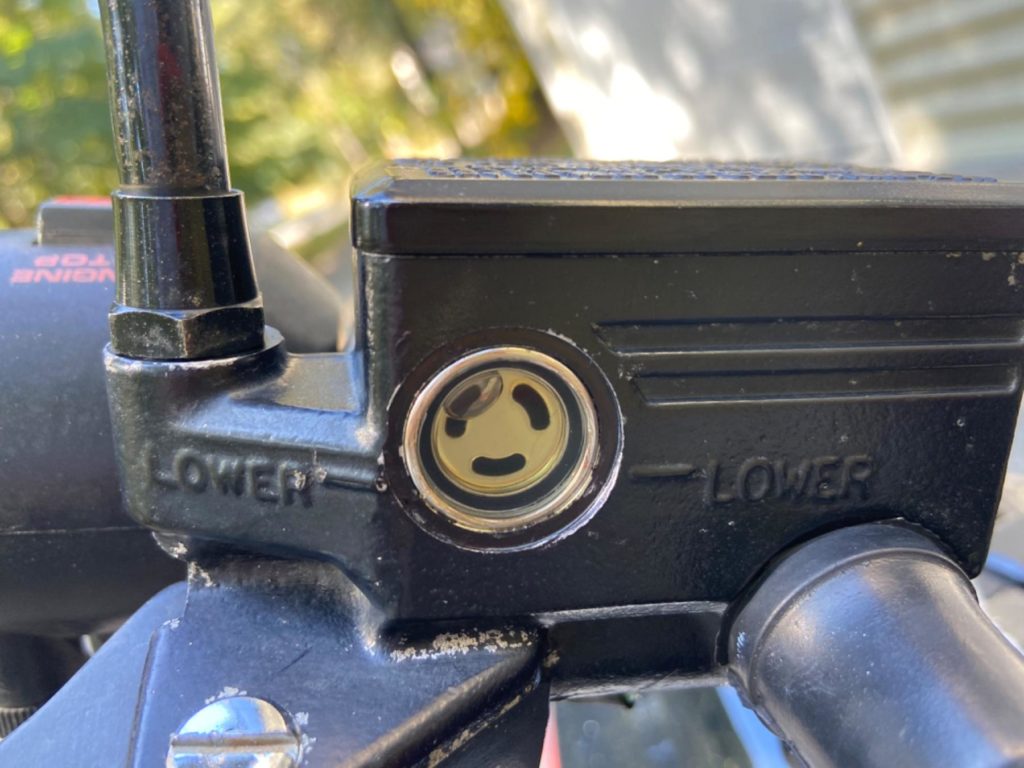
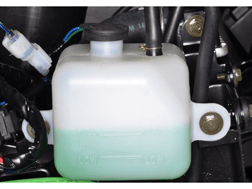
Motorcycles will have other fluids which should be check regularly, as well. This includes brake fluid, but may also include coolant for water-cooled engines, clutch fluid for hydraulic clutches (which is usually just brake fluid), and final drive oil for bikes with shaft drives. Usually there is a translucent reservoir or a sight glass for easy spot checks.
Chassis & Chain
Frame
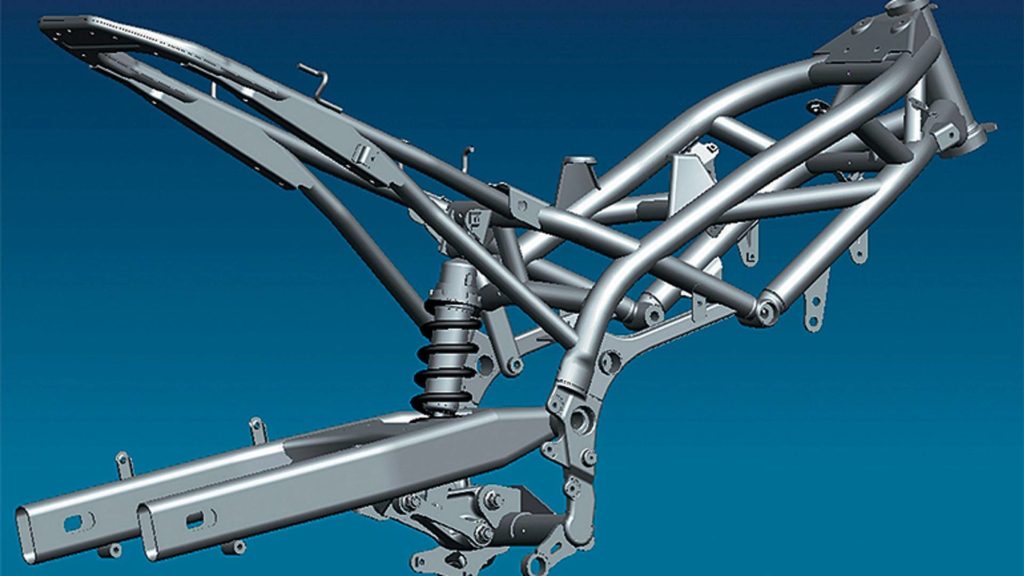
The frame of a motorcycle is the metal structure that everything on your bike is mounted to. You can also include the sub-frame, which is the (often bolted-on) section of the frame that extends upward to hold your seat & tail, and the swing-arm, which is the pivoting arm that connects your rear wheel. Most motorcycle frames are made of steel for strength, but sub-frames and swing-arms are often made of aluminum to save weight.
Because frames are often painted steel, check for damage or wear to the paint which can lead to rusting and weakening of the frame. Any damage to the frame in a crash will usually lead to a total loss from your insurance company, since frame damage can get worse quickly and quite literally lead to your bike falling apart.
It’s also important to periodically check that all bolts & fasteners are appropriately tight — motorcycles vibrate and bolts can eventually work loose. If any bolts have vibrated loose, make sure to use a threadlocker (Loctite) before tightening them back down.
Suspension
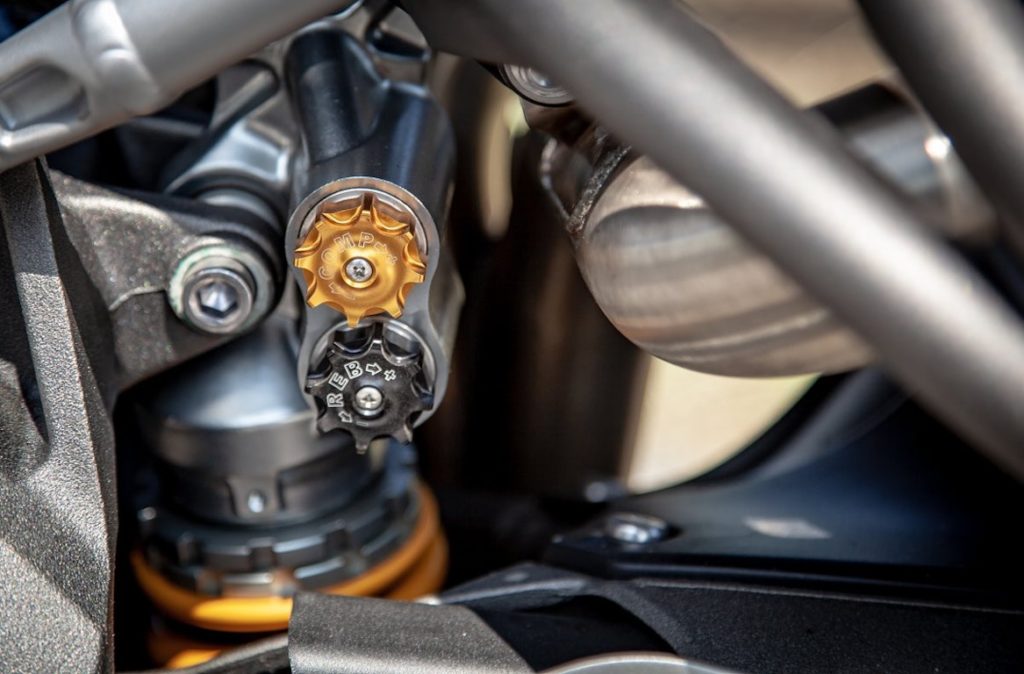
Your suspension is made up of the front forks and rear shock(s). Suspension isn’t just for absorbing bumps, it’s a safety critical system whose main job is to keep your wheels in contact with the ground to maintain consistent traction & stability. Both forks and shocks use springs which are damped by oil to minimize excessive bouncing.
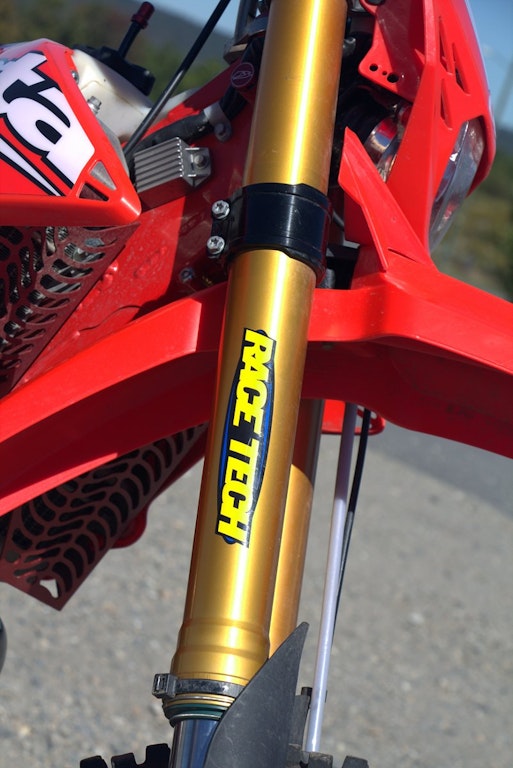
Check for damage and rust on the fork legs and look for signs of leaking oil. The inner tubes should be bright and shiny; any dirt, rust, or gauges can lead to more serious damage. The oil seals in front forks need to be replaced periodically and can be cut by damaged forks tubes or from becoming packed with dirt.
The most important bit of setup for our suspension is setting the rear pre-load (article is aimed at dirt bikes but applies to street bikes as well) — this adjusts how much the rear spring compresses when you sit on the bike. If your bike “sags” too much it increases the chances of bottoming out and can affect handling by increasing the rake. Properly dialing in a suspension is a complex task, but it’s worthwhile understanding the basics, especially for dual sport & sport riders.
Chain
Cleaning, lubricating, and adjusting your chain is probably the most common maintenance task on most motorcycles. A dirty chain will wear & rust faster, which can lead to broken chain and either power loss (best case) or the chain flinging and damaging your engine or leg (worst case). It’s a messy job, but with a little practice should take as little as 15-20 minutes.

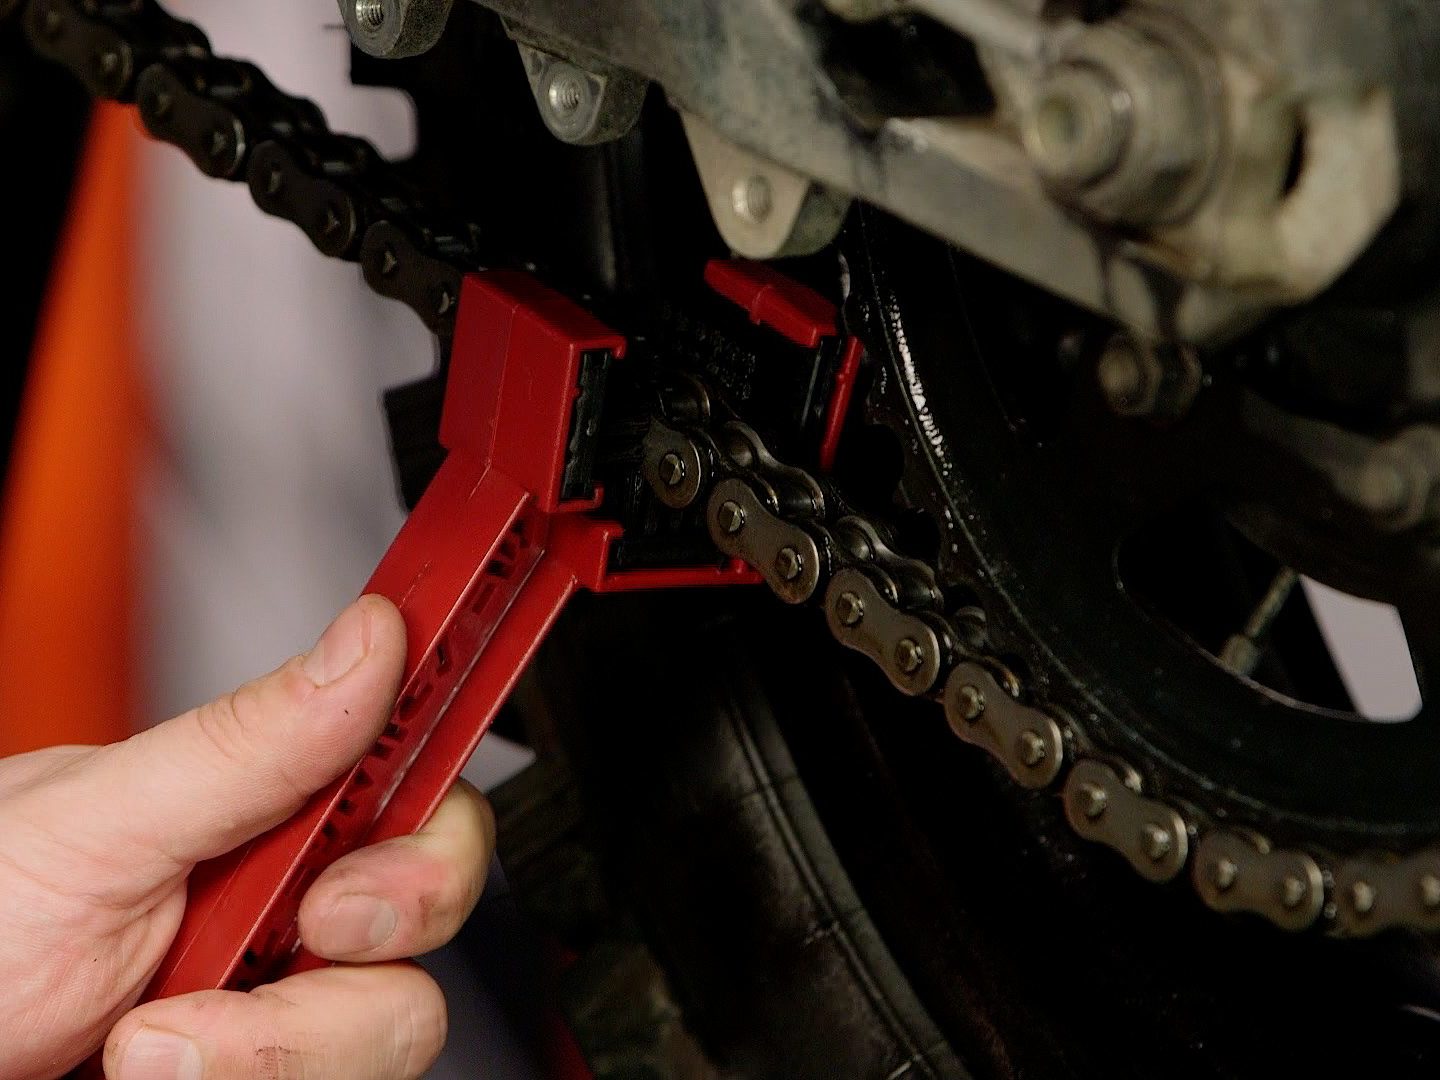
Chains and sprockets will eventually wear out and need to be replaced. The chain also needs to be adjusted for proper tension periodically since they do stretch out as they wear. Too tight and a chain will wear faster, too loose and you risk the chain coming off the sprocket.
Stands
Whether your motorcycle has a side stand, center stand, or both, make sure that their springs are not rusted/worn and the stands smoothly and firmly return when you flip them up. A loose stand can also cause phantom electrical issues if it bounces enough to activate the side stand safety switch. Make sure the mounting points for the stand are in good shape and all bolts are tight — a motorcycle without a stand is very inconvenient, especially if you’re miles from home.
Working on your bike
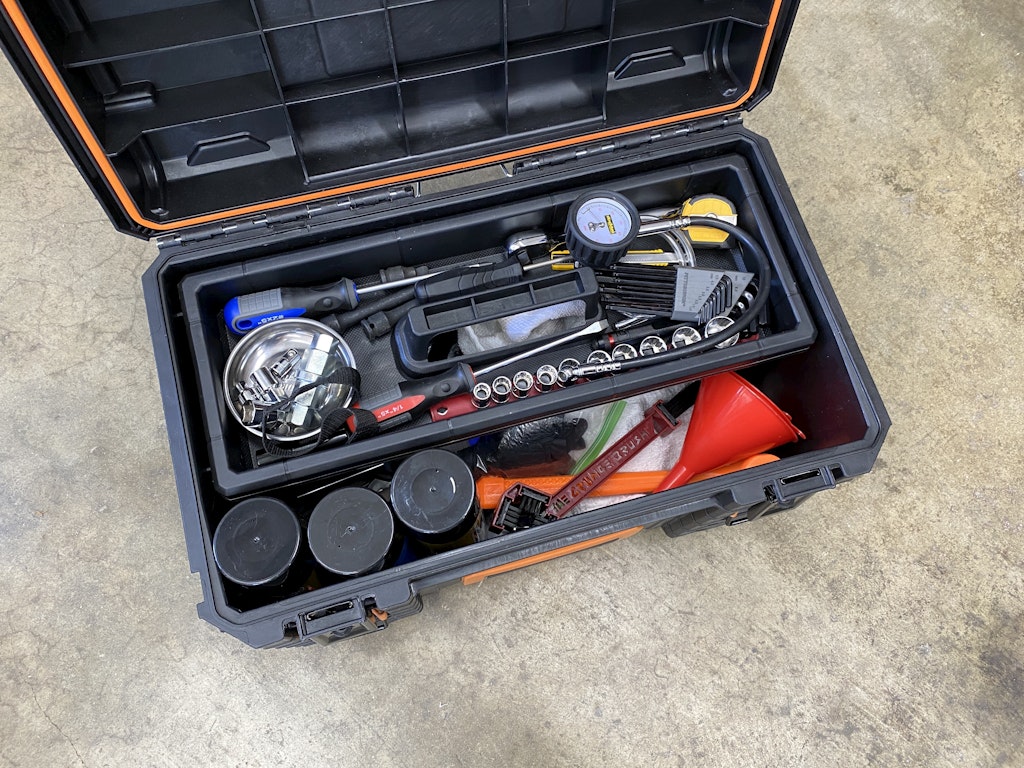
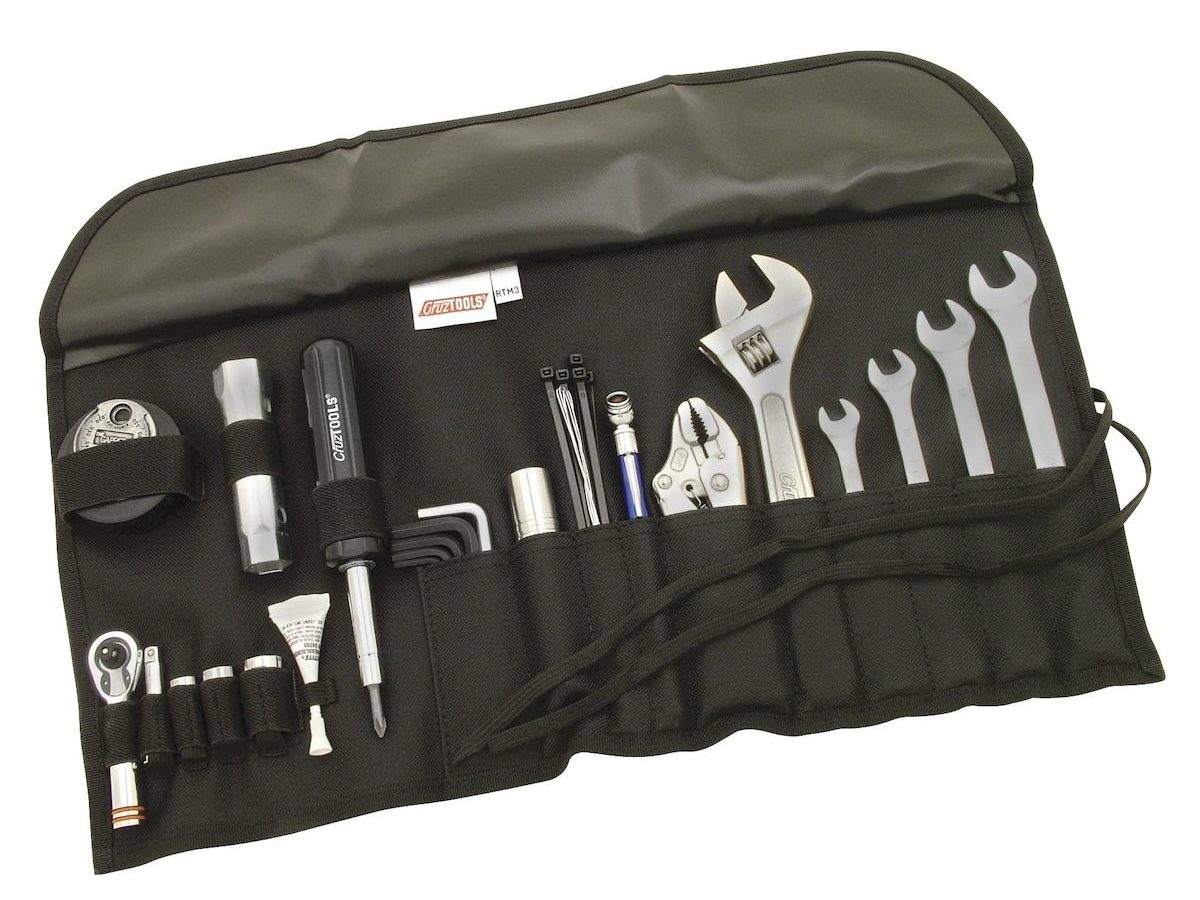
You can do almost everything listed above with a pretty basic set of hand tools, many of which you probably already own (ratchet & sockets, wrenches, & hex keys are all you need most of the time). In addition to a set of garage tools, I’d recommend throwing together a basic motorcycle kit to carry with you when riding (the tool kits that come with most modern bikes are pretty poor). Some jobs do require specialty tools, but you can collect those over time as you need them.
Wrenching on your own bike isn’t for everyone, but it’s a great way to get to know your motorcycle. It’s way easier to recognize if something doesn’t feel/look/sound right when you’re familiar with how it’s supposed to feel, look, and sound. You don’t need to do every job, but just by handling the basics like oil changes, chain maintenance, and brakes you can save yourself a lot of time & money waiting on a shop to do it for you.
Changing tires (especially tubeless street bike tires) can be a huge pain, but you can save a lot of money by taking your wheels off yourself and taking them to a shop like Cycle Gear instead of rolling your bike into a dealership. Just be aware that you’ll need some way to keep the bike supported without its wheels on (center stand, bike stand, etc).
Here’s a couple helpful starter tips if you do want to get started:
- It’s easier to cause problems by over-tightening than under-tightening. A decent torque wrench and shop manual will help you know how tight to go when bolting things back together.
- Motorcycles vibrate. A lot. Use Loctite or other thread locker to keep bolts from shaking loose during rides, just remember that a little bit is usually all you need. Excess thread locker just gets squeezed out and makes a mess.
- If your motorcycle doesn’t have a center stand you’ll want some kind of a lift or stand. Even if you don’t need to take a wheel off, raising the bike off the ground can be easier on your back & knees.
- Take your time, take pictures as you go for reference, and try to keep parts and your workspace organized
- When all else fails, ask for help. If you don’t have someone in your life who’s a decent wrench you can turn to forums for your make & model.